Knowledge Base User Guide
This document provides a step-by-step guide on how to create, update, bind, and manage a knowledge base. It helps users efficiently upload and manage documents, as well as integrate with a bot.
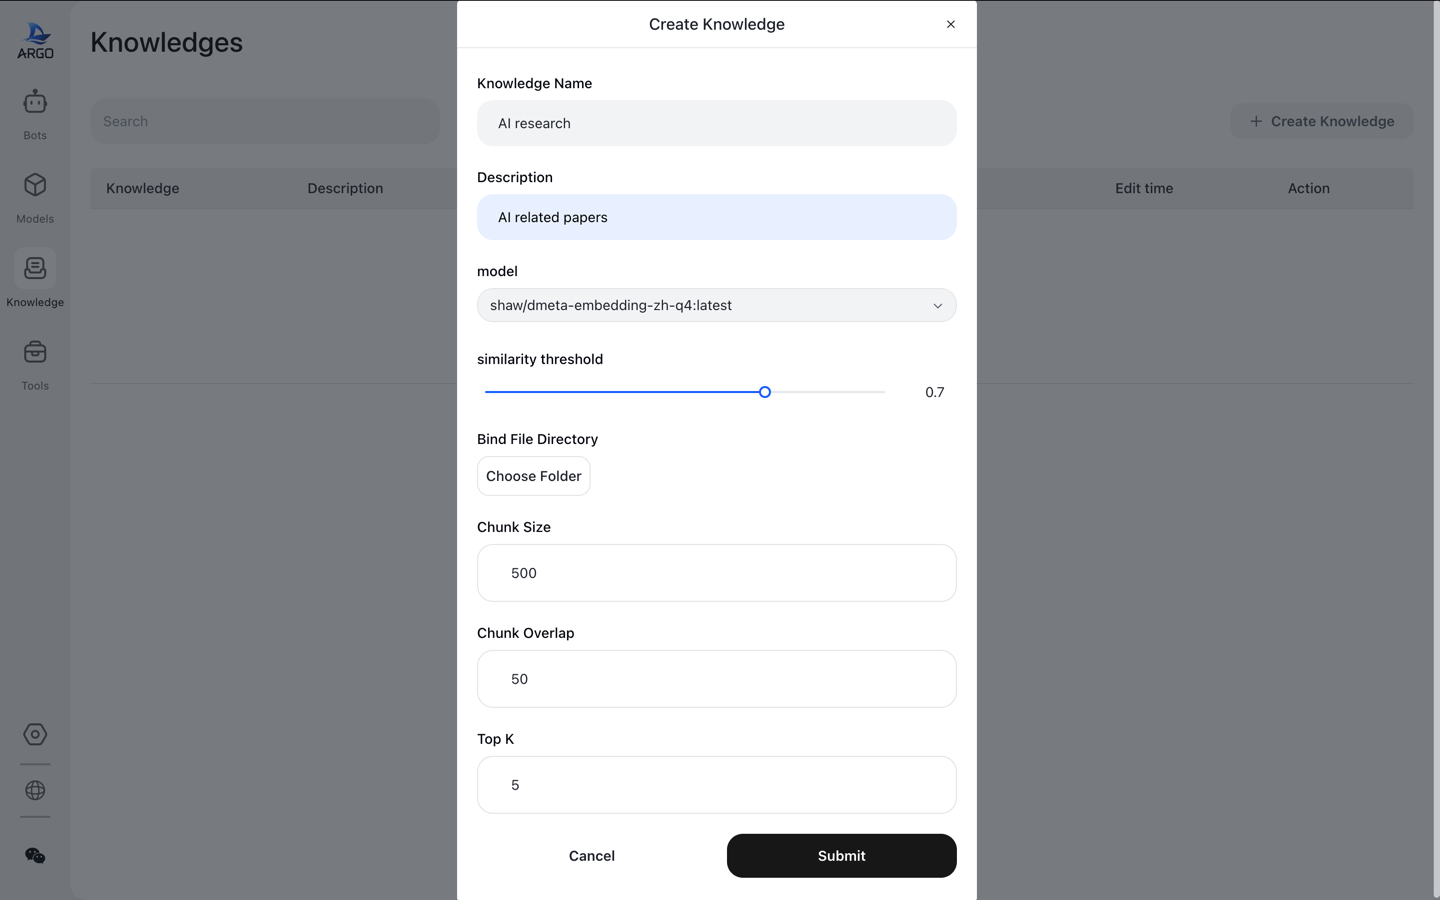
1. Creating a Knowledge Base
Follow these steps to create a knowledge base:
-
Set Knowledge Base Name and Description: Provide a clear name and a brief description to easily identify the content of the knowledge base.
-
Choose Embedding Model: Select an appropriate embedding model for document retrieval in the knowledge base.
-
Configure Similarity Threshold: Set the similarity threshold for retrieval, which will affect the relevance of the query results.
-
Adjust Text Segmentation Parameters:
- Chunk Size: Defines the size of each text chunk. A larger
chunk_sizewill include more context in each chunk, but setting it too large may exceed the model's context window. If you want to perform document-level retrieval (e.g., RAG), you can set thechunk_sizeto a larger value (e.g., 5000 characters or more). However, please note that setting this too large may lead to exceeding the model's maximum context length. - Overlap: Defines the overlap between text chunks. A small overlap (10%-20% of the chunk size) helps preserve context and avoid loss of important information.
- Top K: Configures how many of the most relevant results are returned during each retrieval. Higher values for
Top Kwill return more matching results but will also increase computational cost.
Example:
- If you want to perform RAG-based retrieval on an entire document, you can set
chunk_sizeto 5000 characters,overlapto 500 (i.e., 500 characters of overlap), andTop Kto 10. This means each retrieval will return the top 10 most relevant chunks.
- Chunk Size: Defines the size of each text chunk. A larger
-
Click Submit: Once all settings are configured, click the "Submit" button to save and create the knowledge base.
Optional Configuration - Folder Path
This is an optional setting. If you provide a folder path, the knowledge base will sync with the specified folder, similar to a personal cloud storage function. If the directory does not exist, an error message will be displayed.
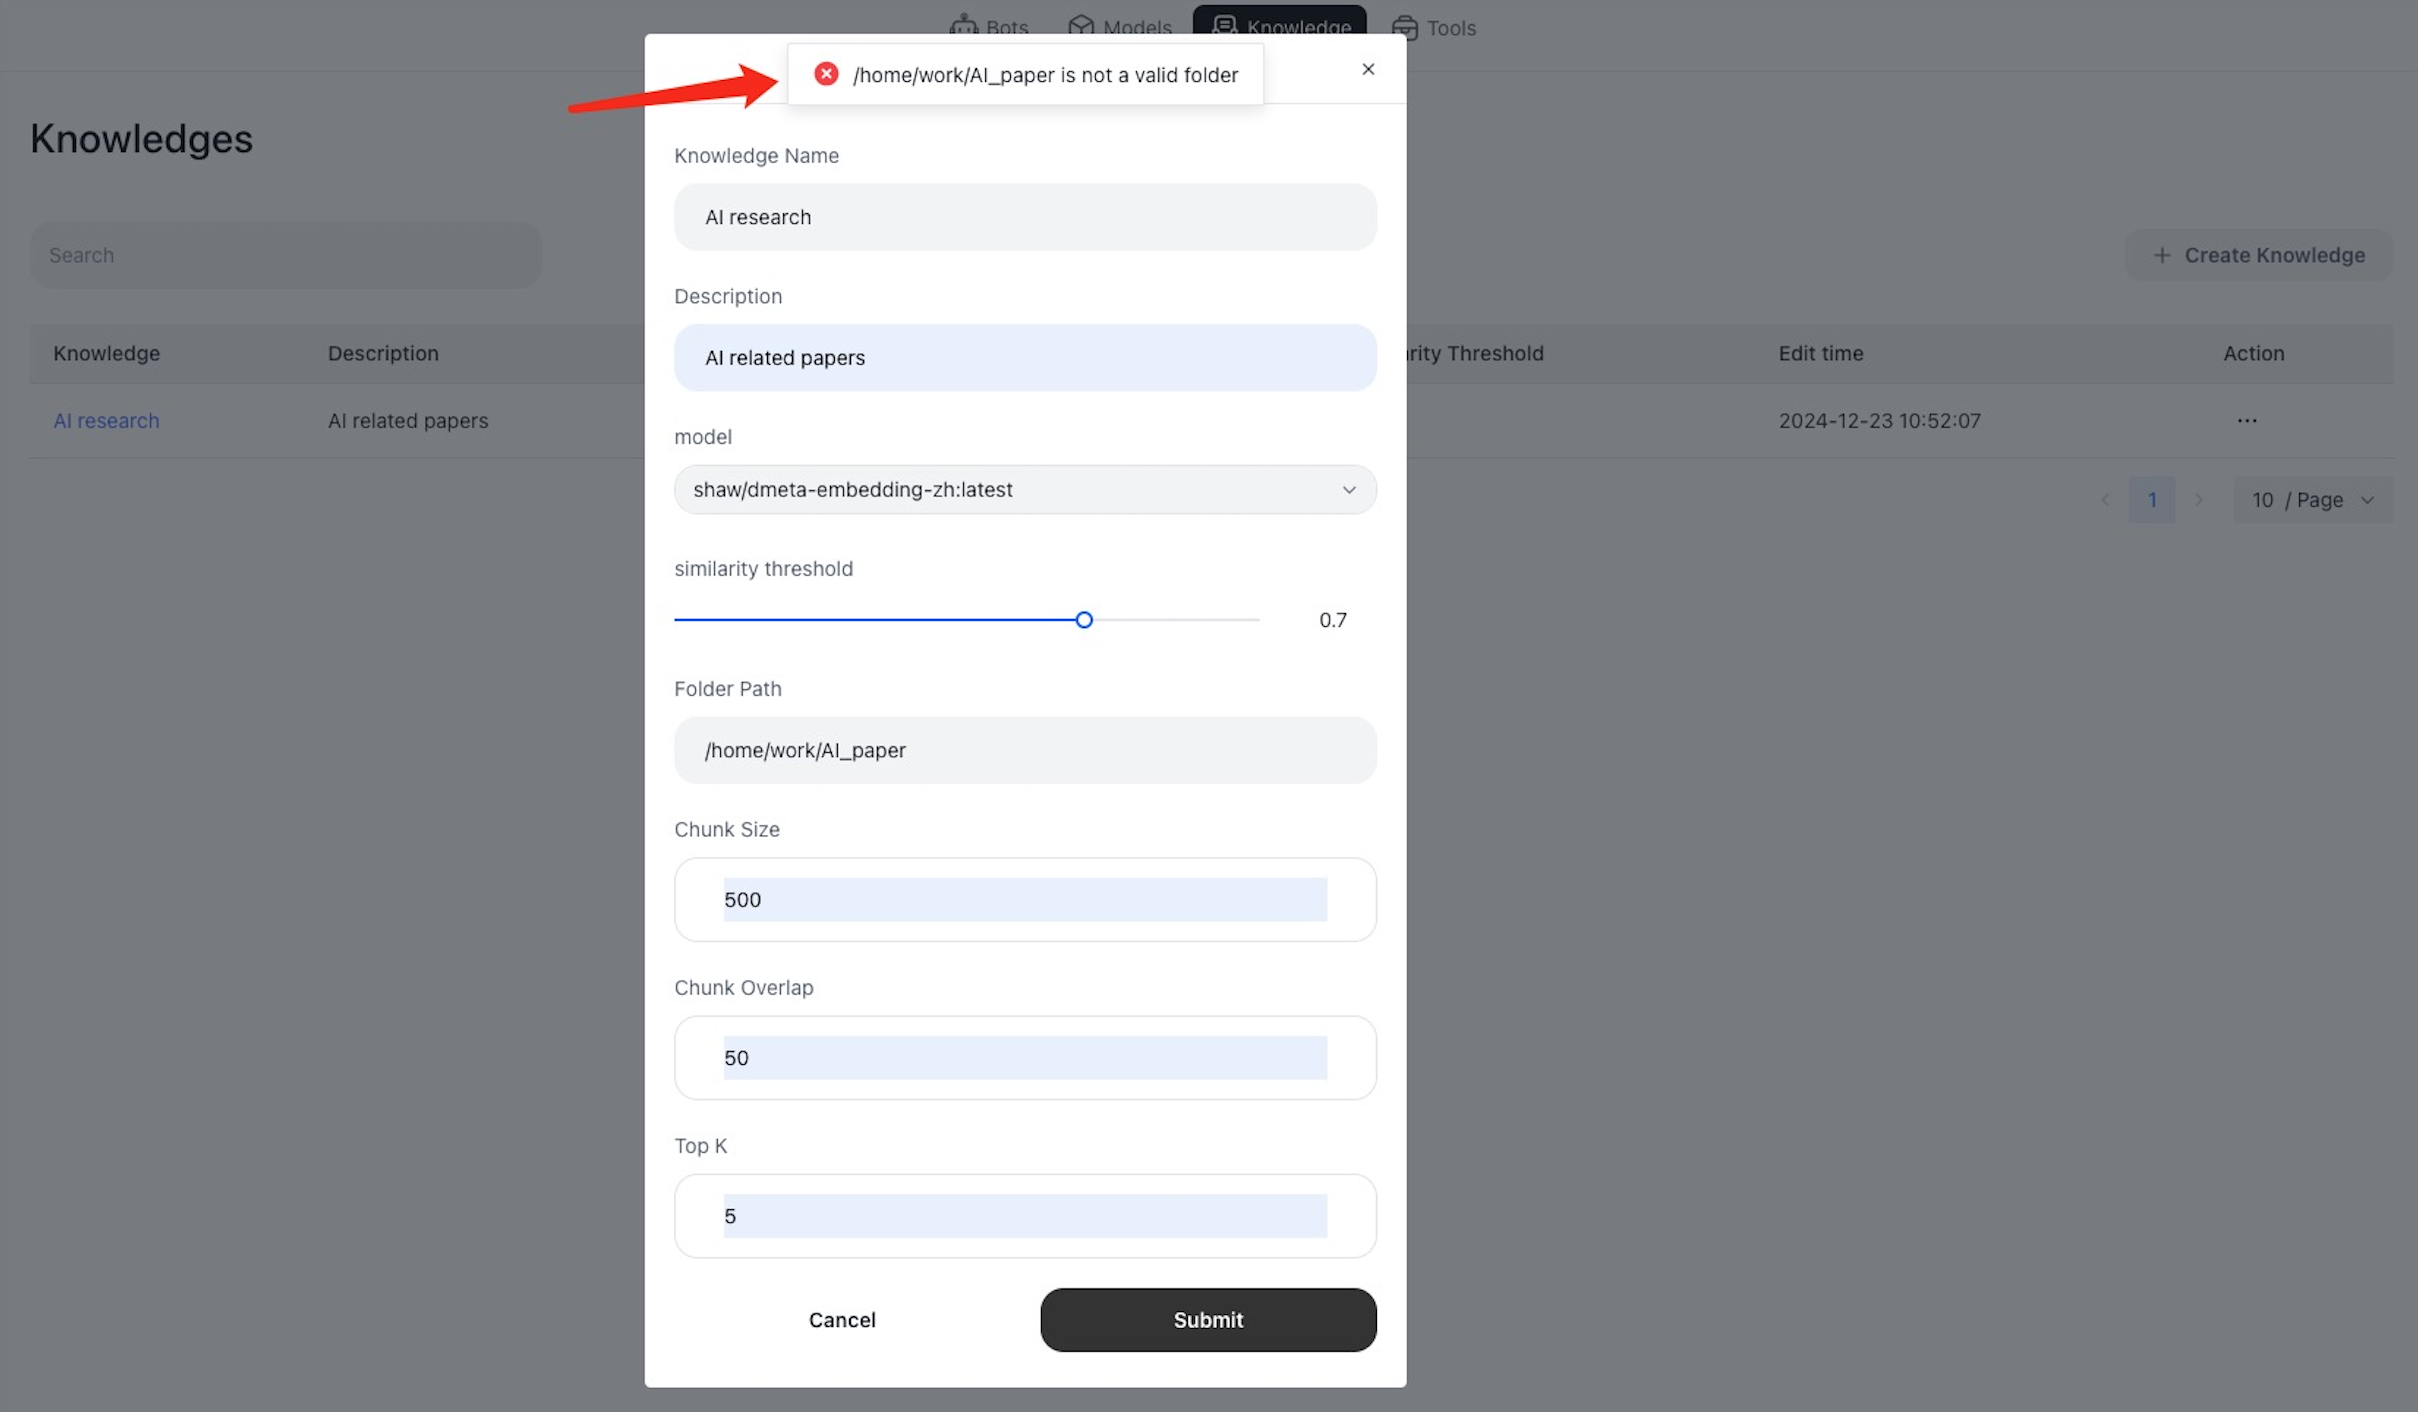
Once the knowledge base is created, you will see it listed in your knowledge base list.

2. Updating a Knowledge Base
To update an existing knowledge base, simply click on the update button in the knowledge base list. Below is a screenshot of the update interface:

Note: When you change chunk_size, overlap, or embedding_model, the knowledge base will rebuild its index.
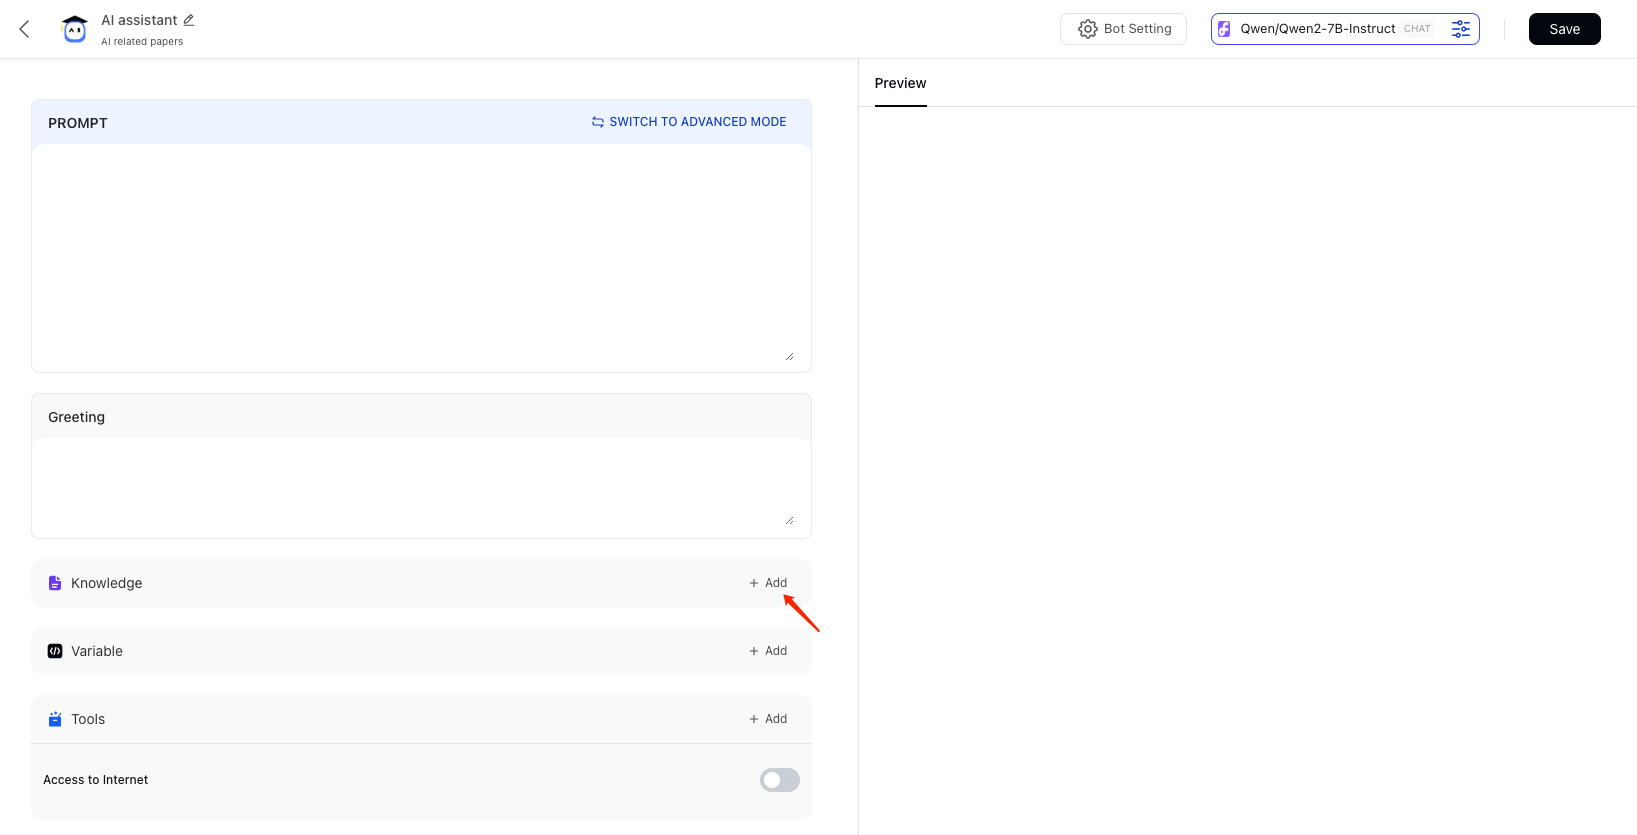
3. Binding a Bot
To enable a bot to access and utilize the knowledge base, you need to bind the knowledge base to the bot. Follow these steps:
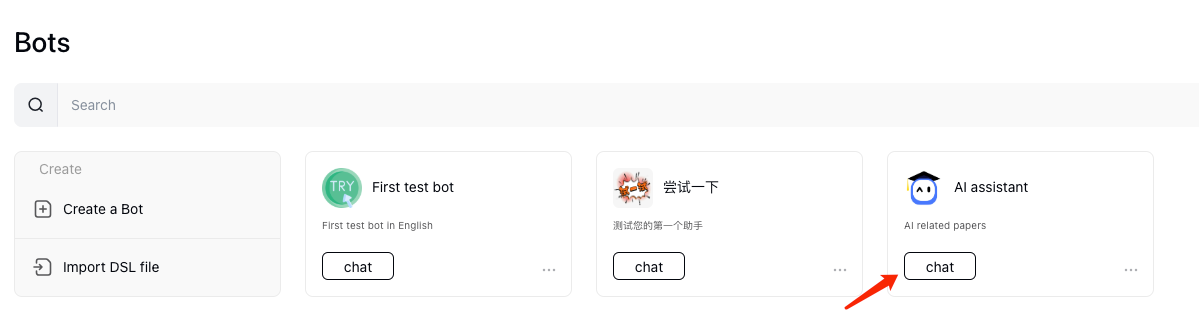
- Go to the “Bot” page.
- Click the “Bind Knowledge Base” button.
- Select the knowledge base you want to bind.
4. Uploading Documents
You can upload documents in two ways:
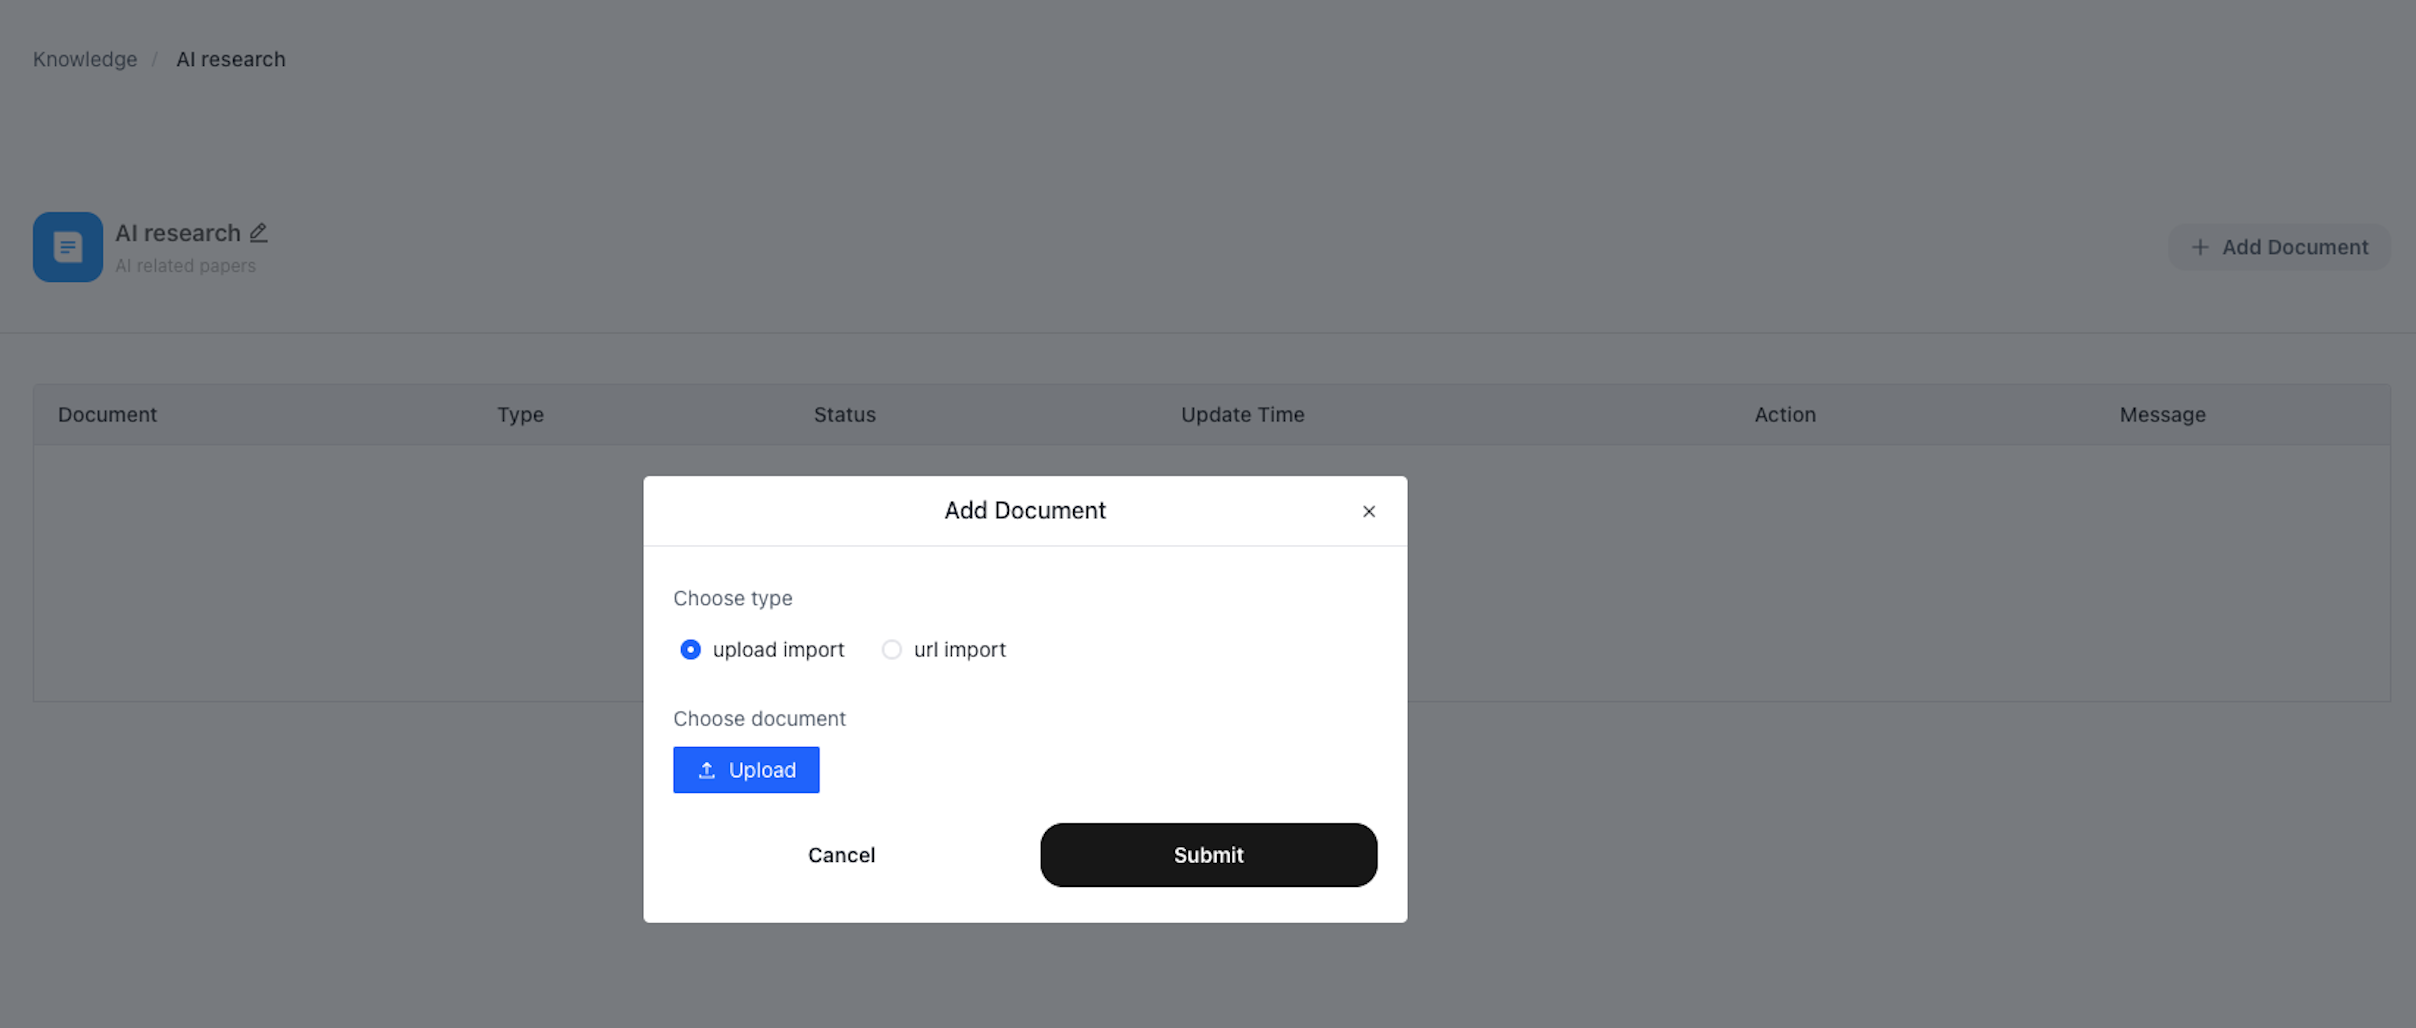
4.1 Directly Upload to the Knowledge Base
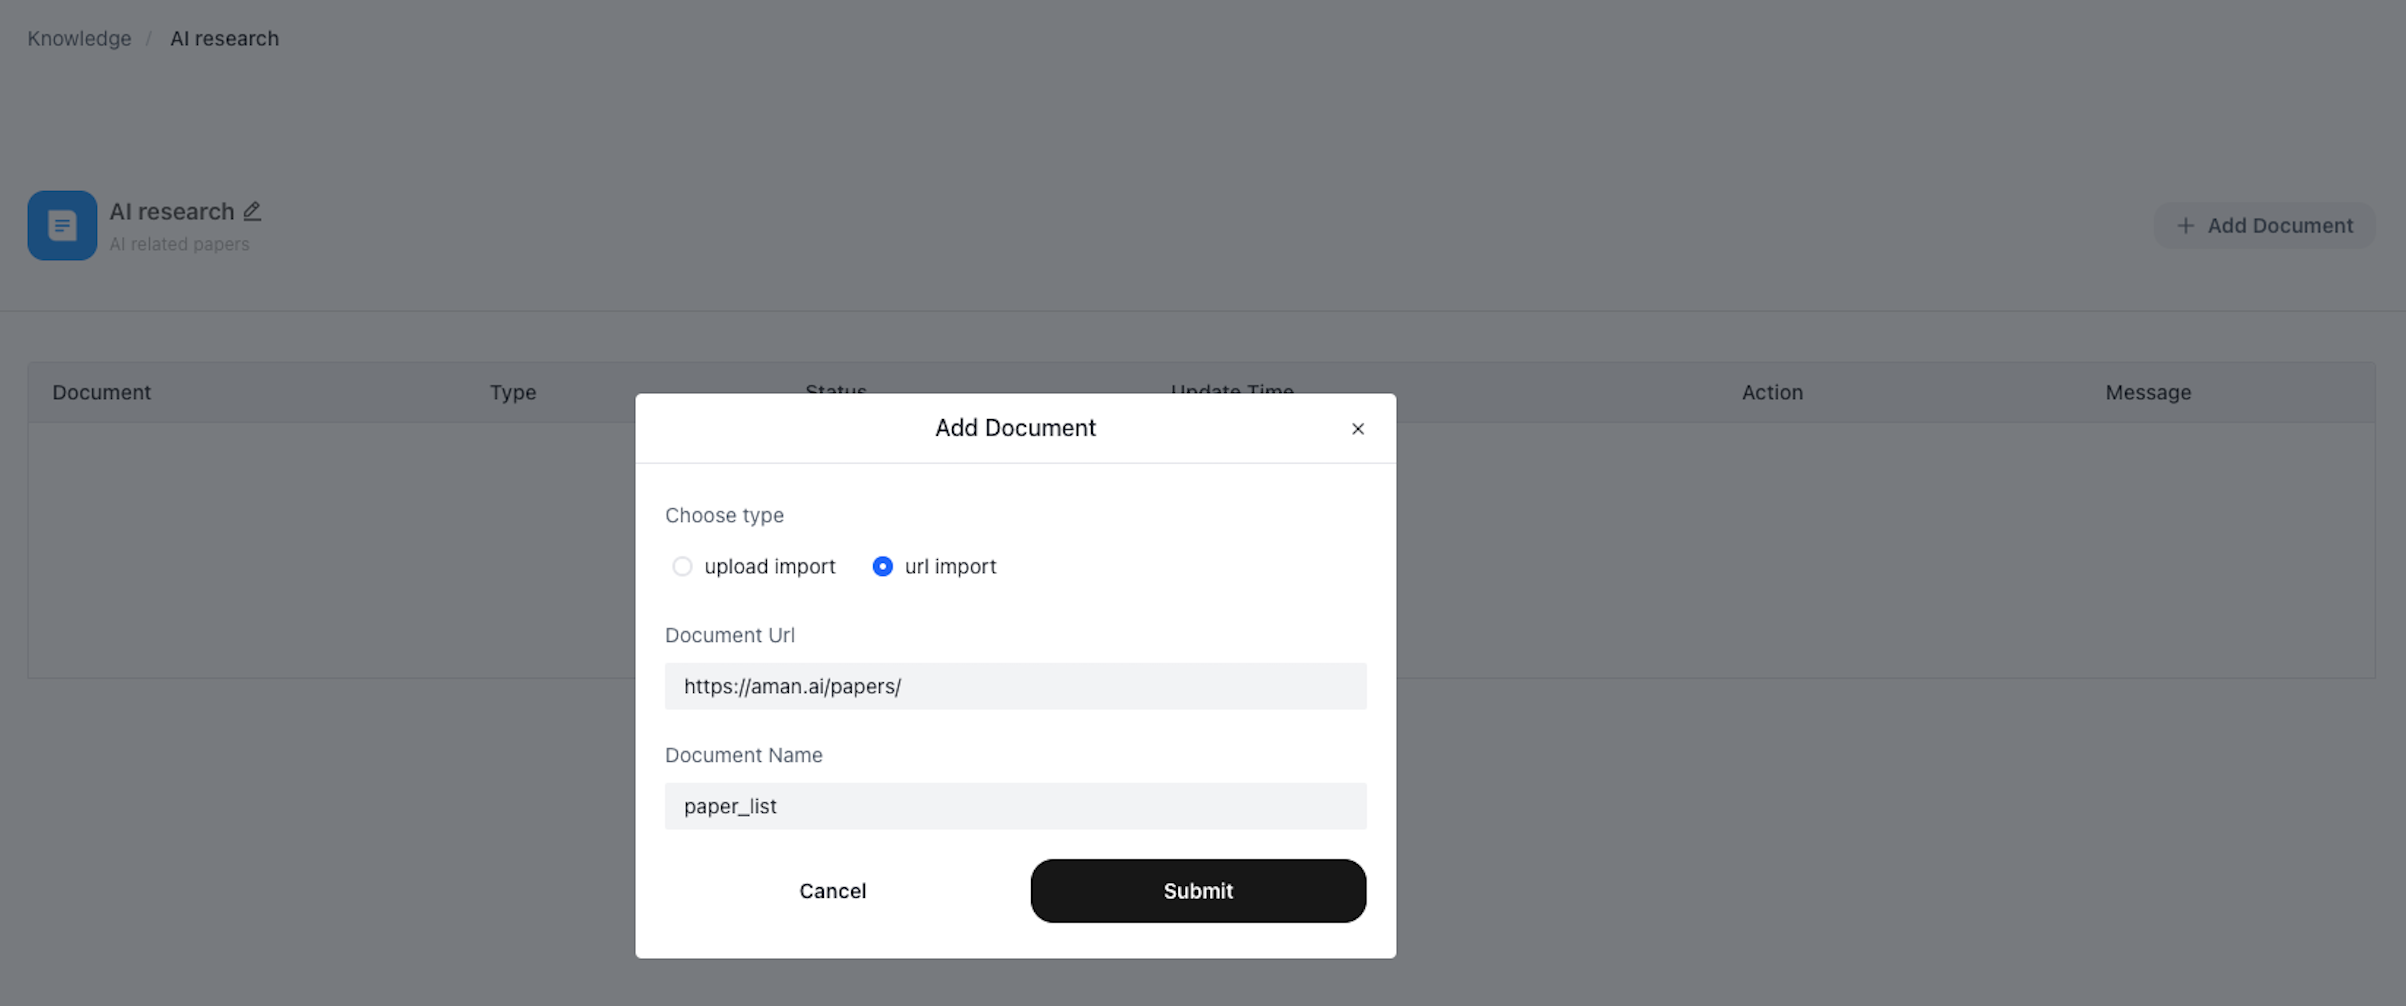
Go to the respective knowledge base page and click the upload button. Two types of upload are supported:
- Upload a File: Directly upload a file from your local machine.
- Upload a URL: Provide a URL of the document to be parsed.
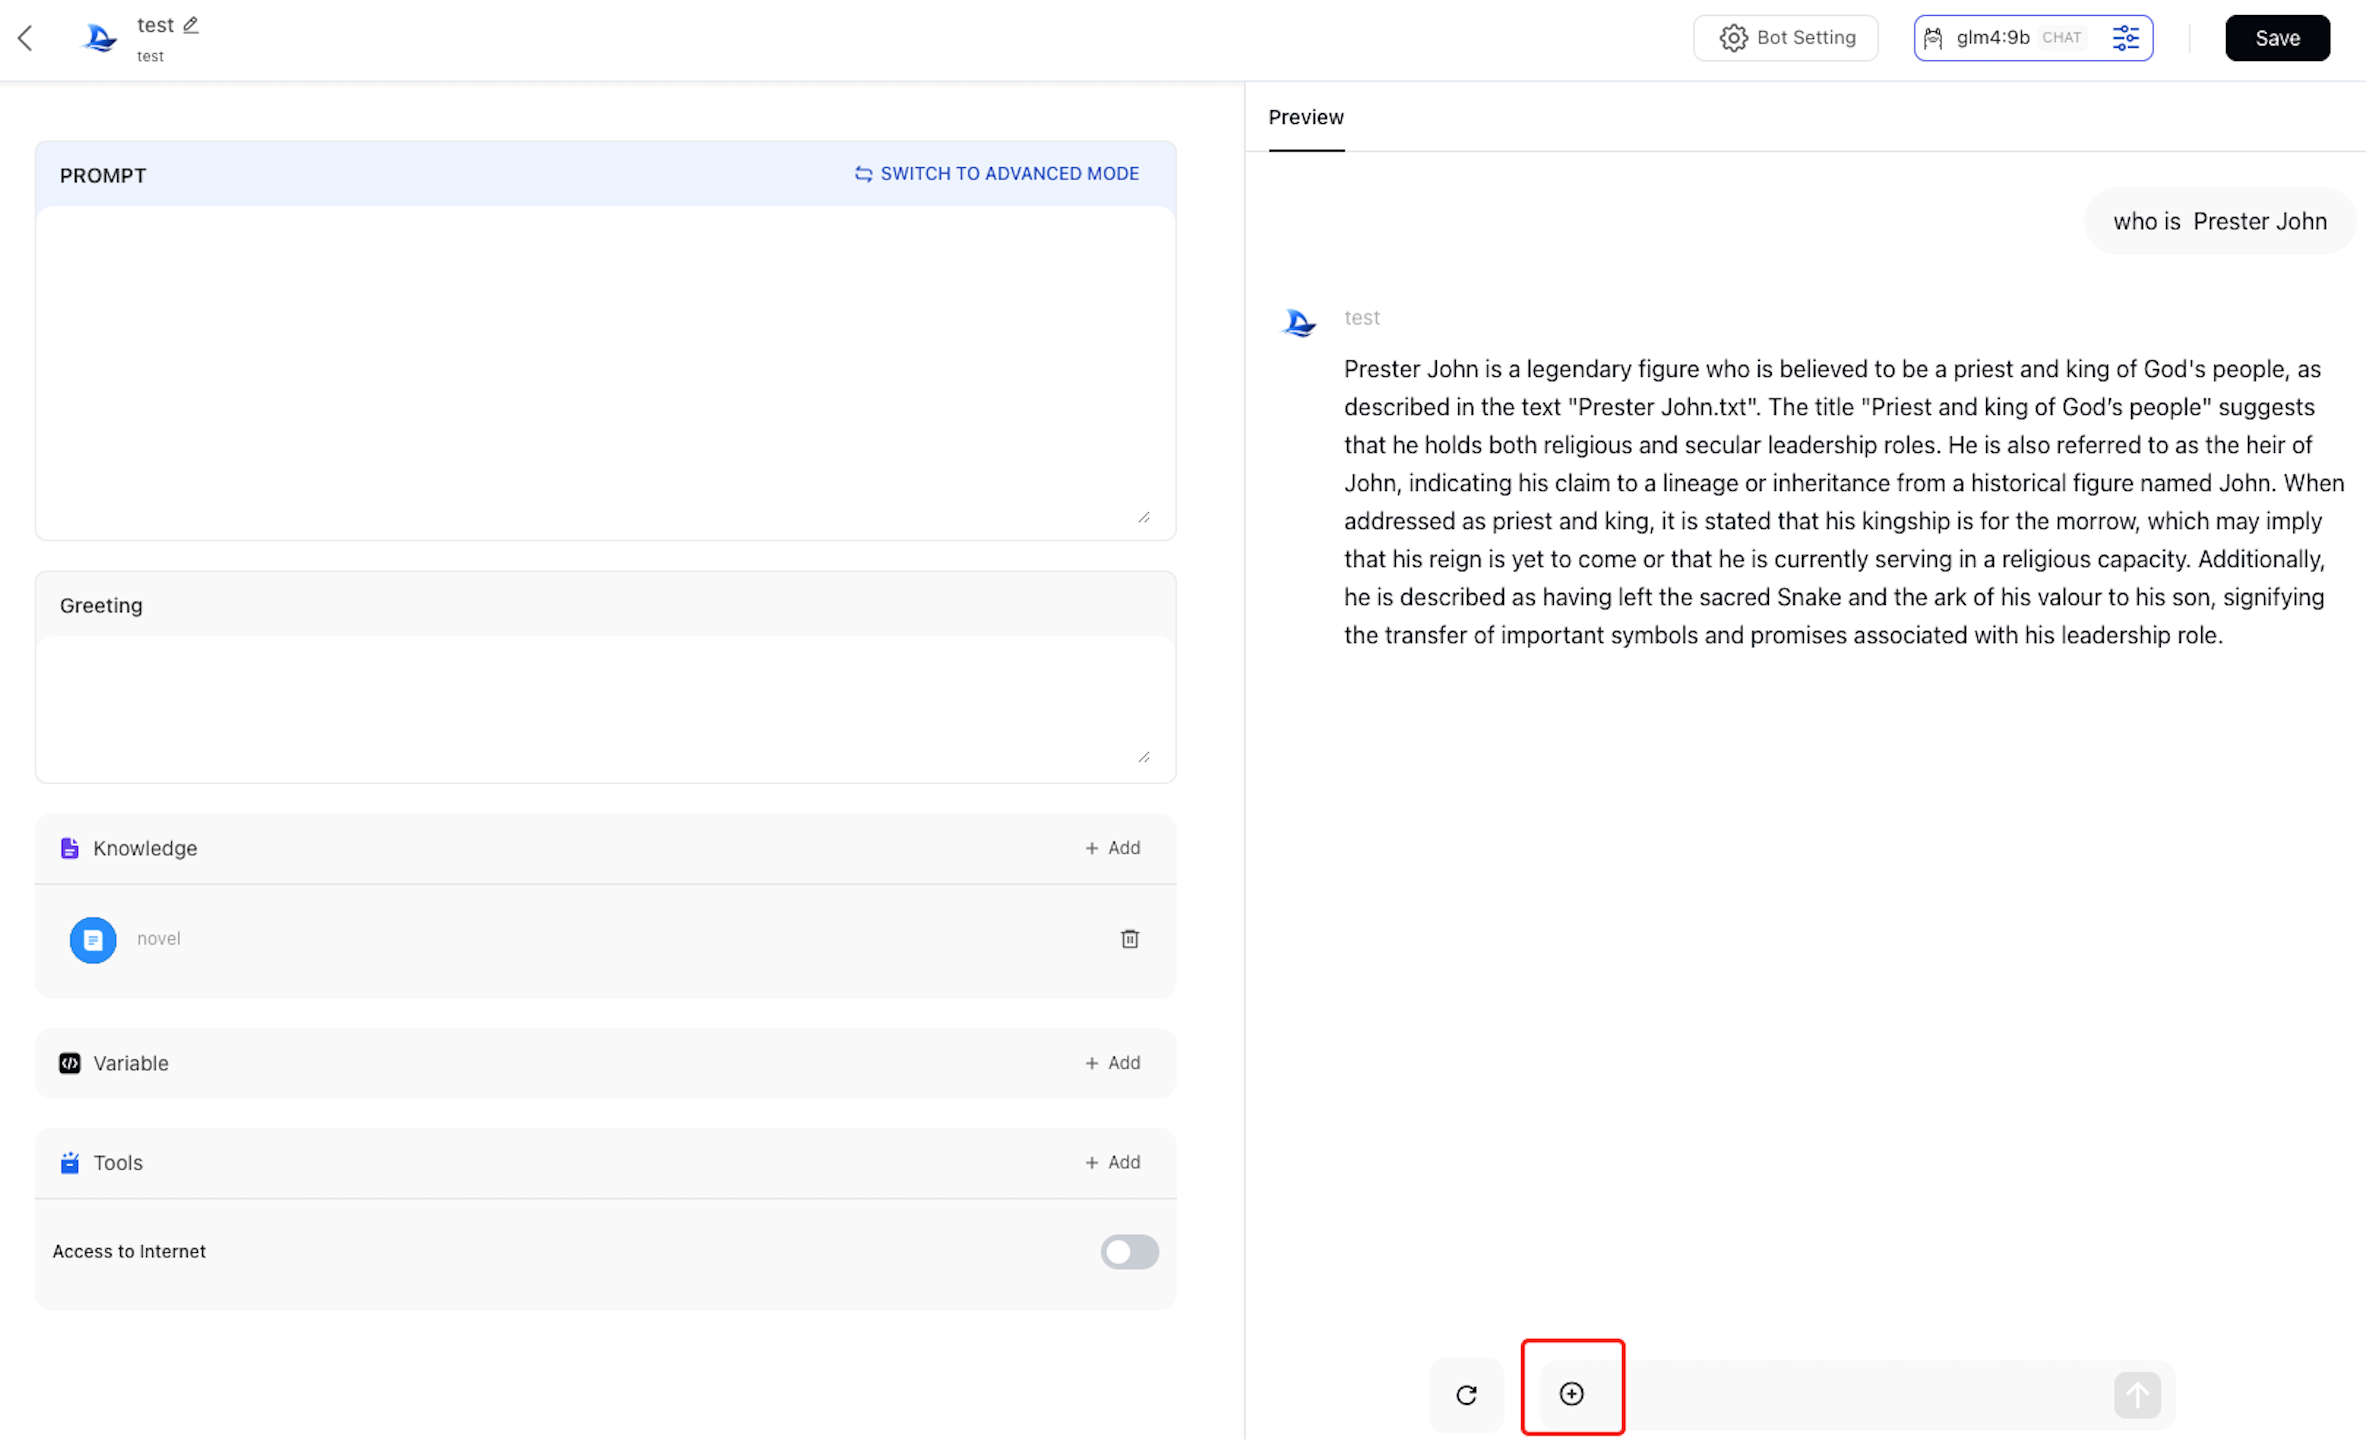
4.2 Upload Documents via Chat Interface
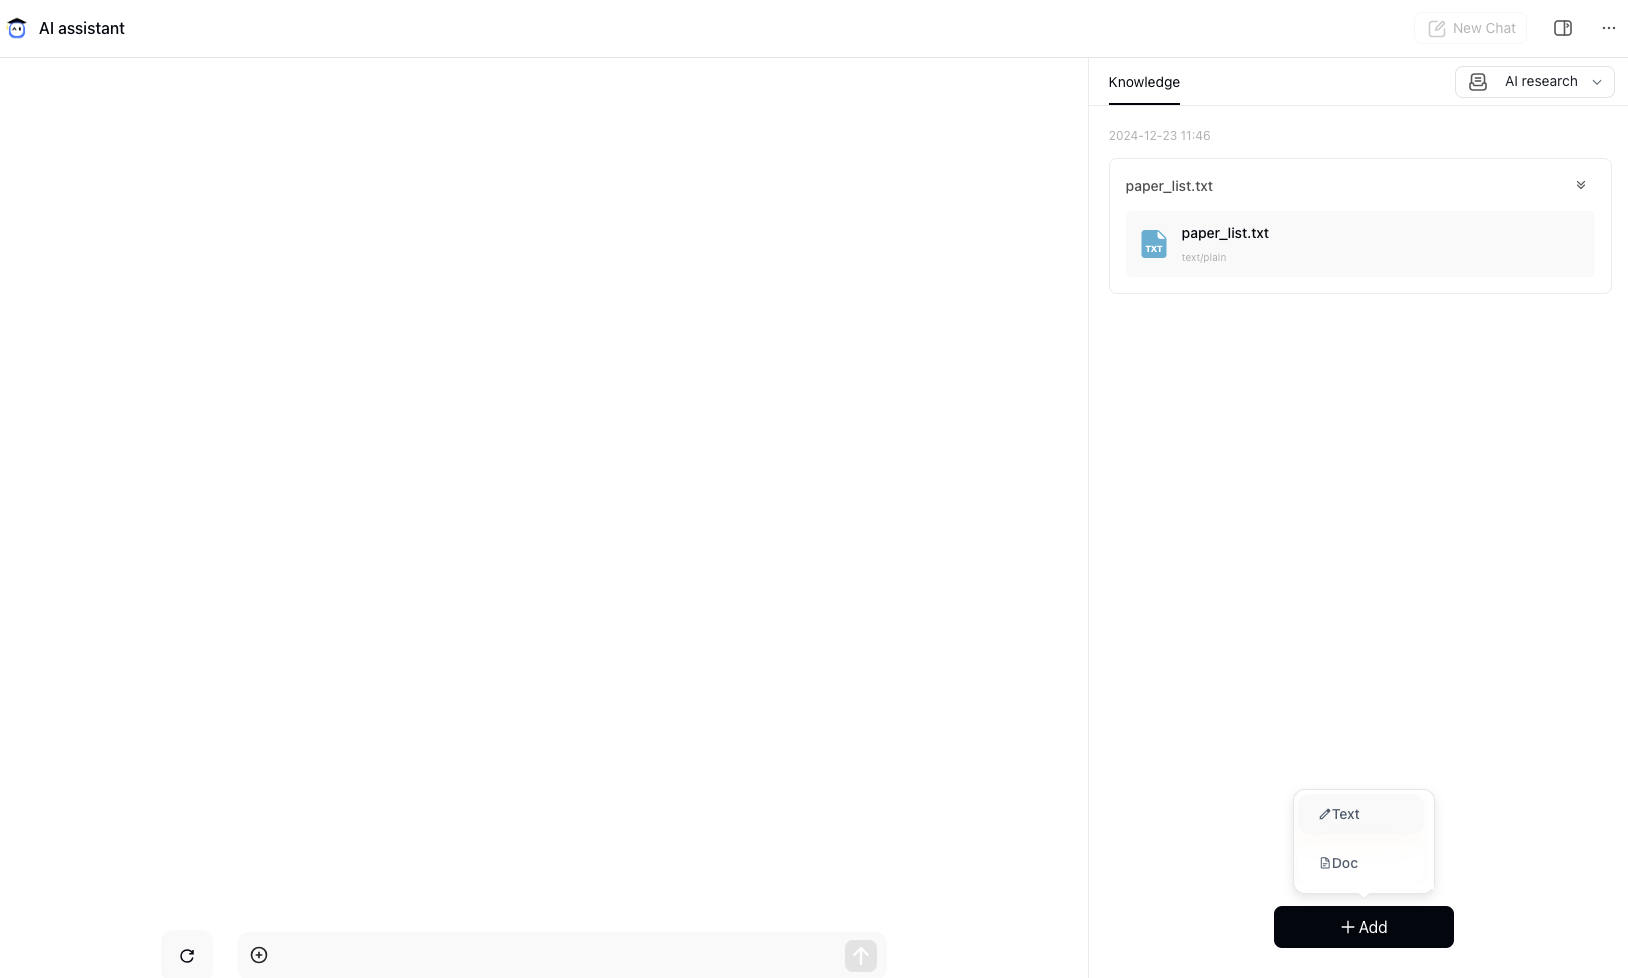
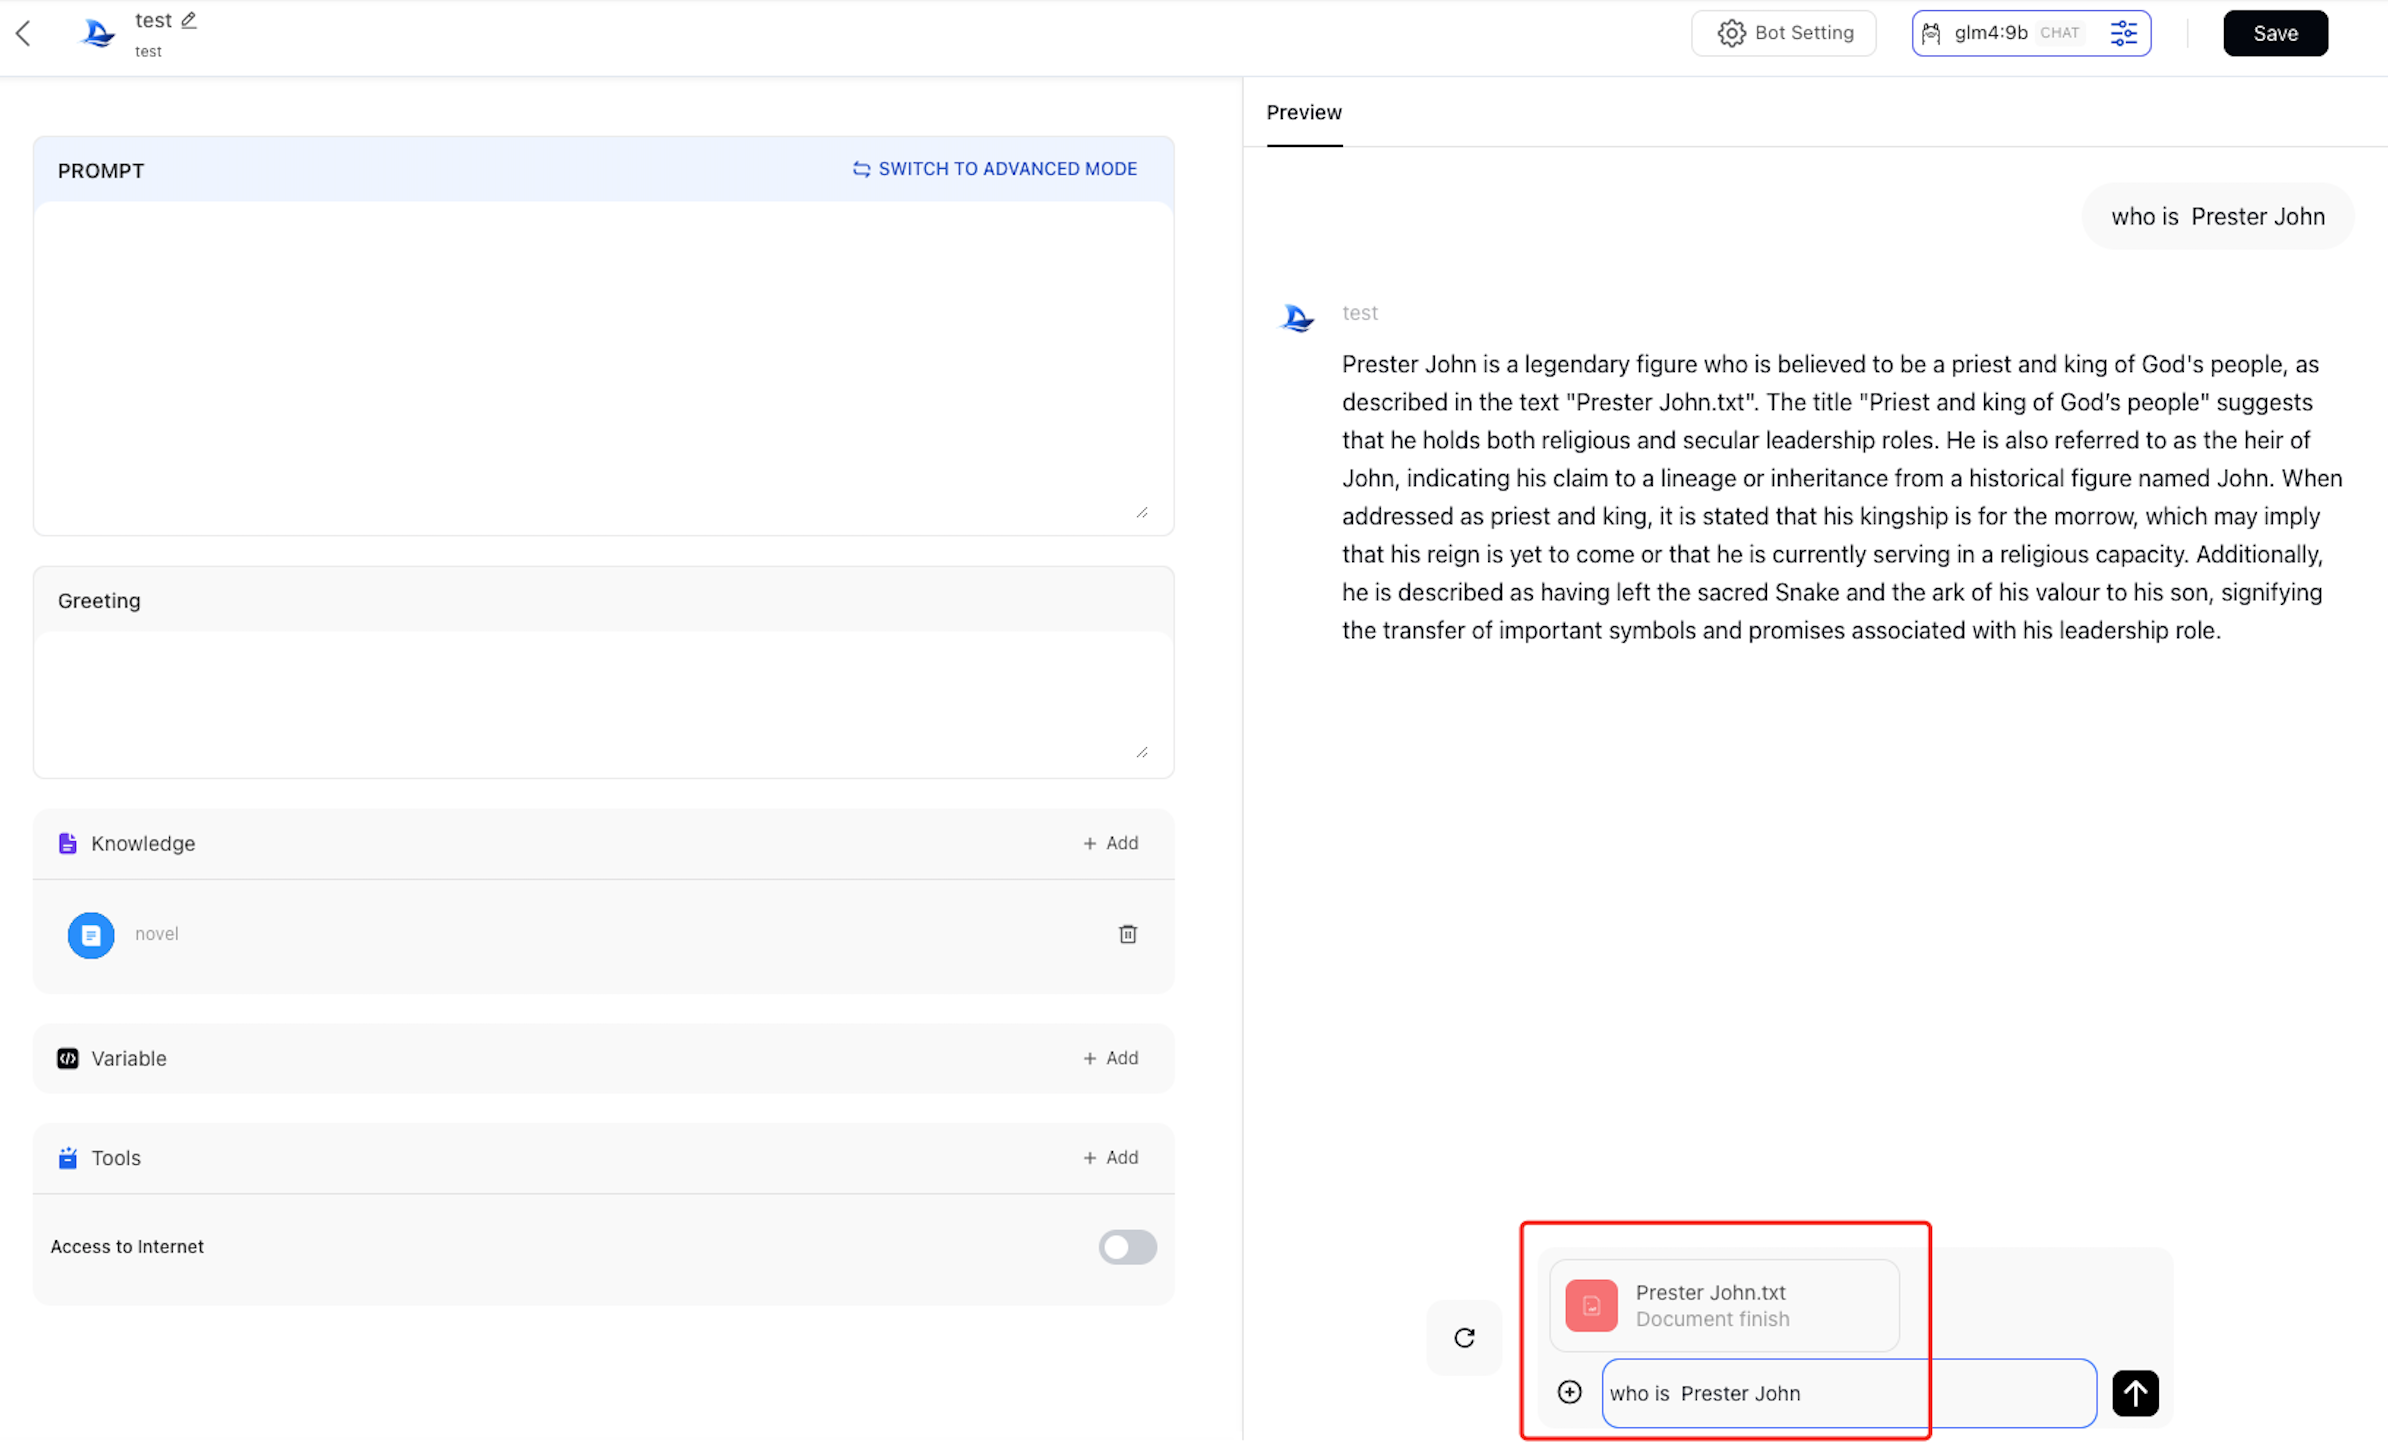
Once the bot is bound to the knowledge base, you can also upload documents via the chat interface. Click the upload button at the bottom right of the chat page to upload a document.
After uploading, the system will automatically generate a summary of the document.
5. Checking Document Parsing Progress
After uploading a document, you can check its parsing progress. Below is the interface that shows the parsing status:

6. How to Check if the Knowledge Base is Active
6.1 Check if the Knowledge Base Was Successfully Loaded
After uploading and creating the knowledge base, you can run a query to check if the knowledge base is active. During the query, the system will return relevant chunks. If no results are found or relevant content is missing, please check the following:
- Ensure that the
chunk_sizeandoverlapsettings are reasonable. - Confirm that the uploaded documents have been correctly parsed and stored in the knowledge base.
- Refer to the steps in section 6.2 for further validation.
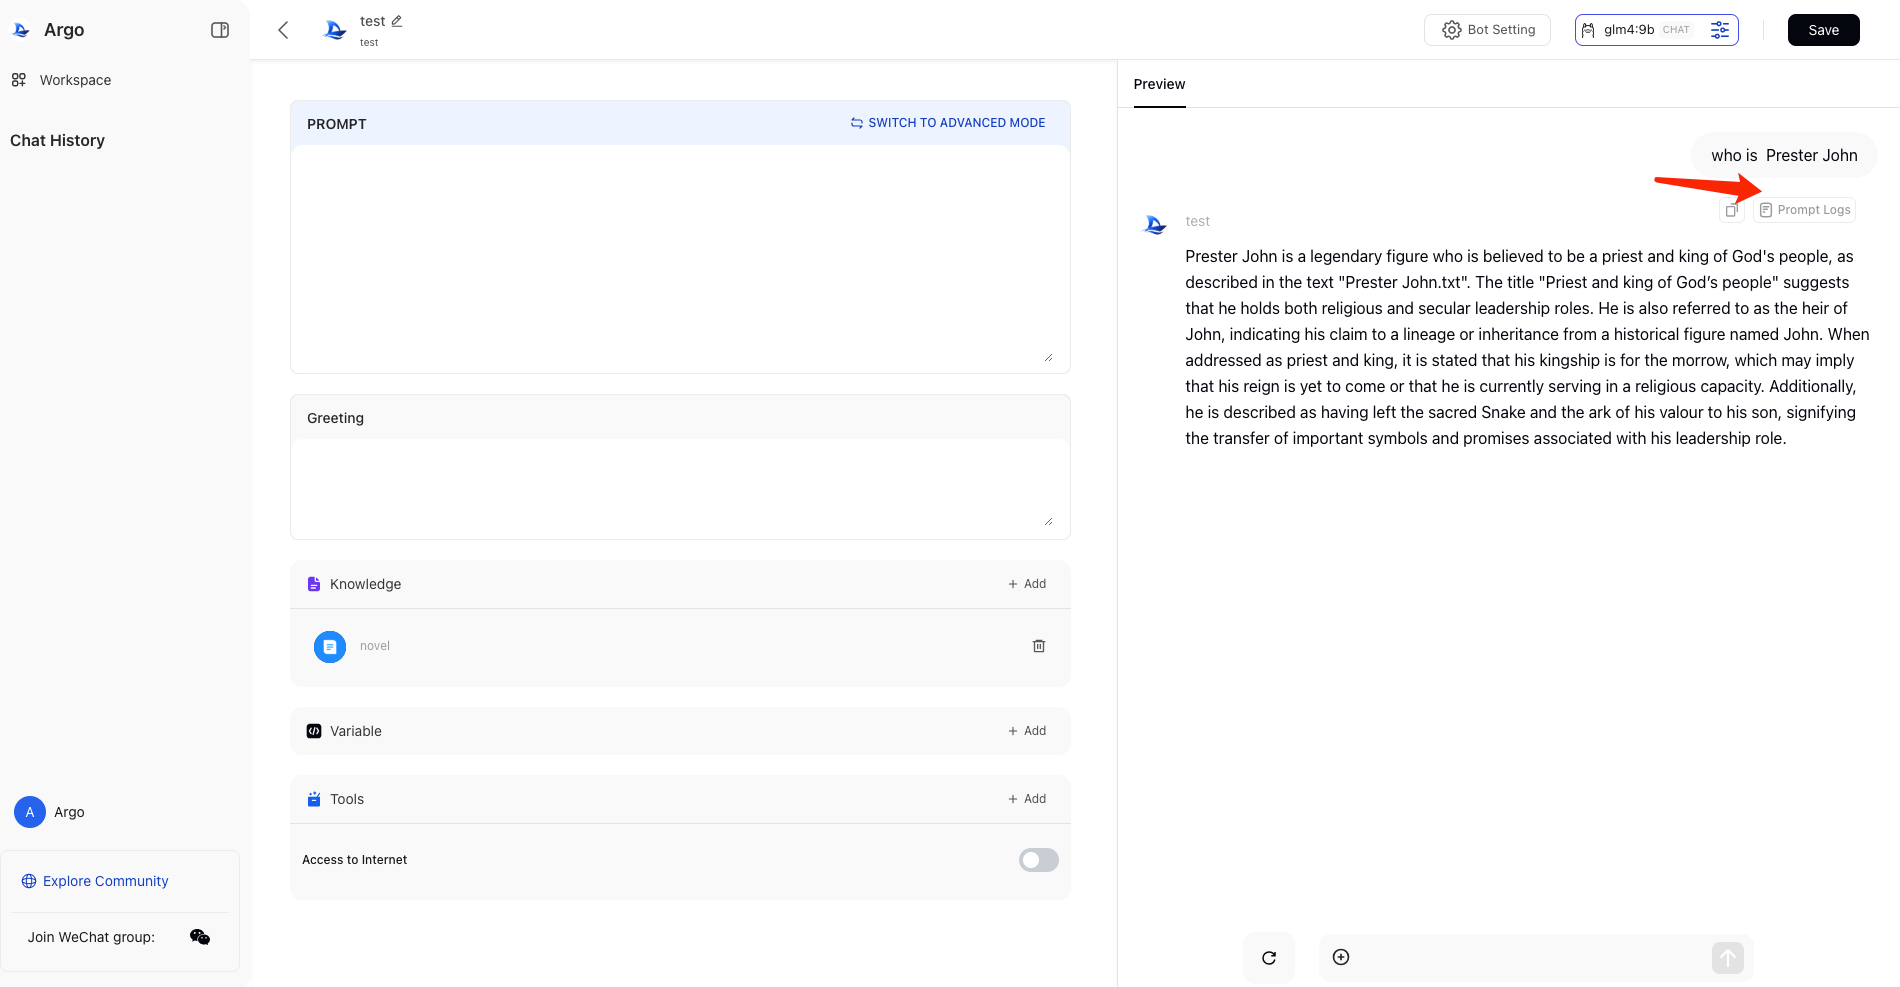
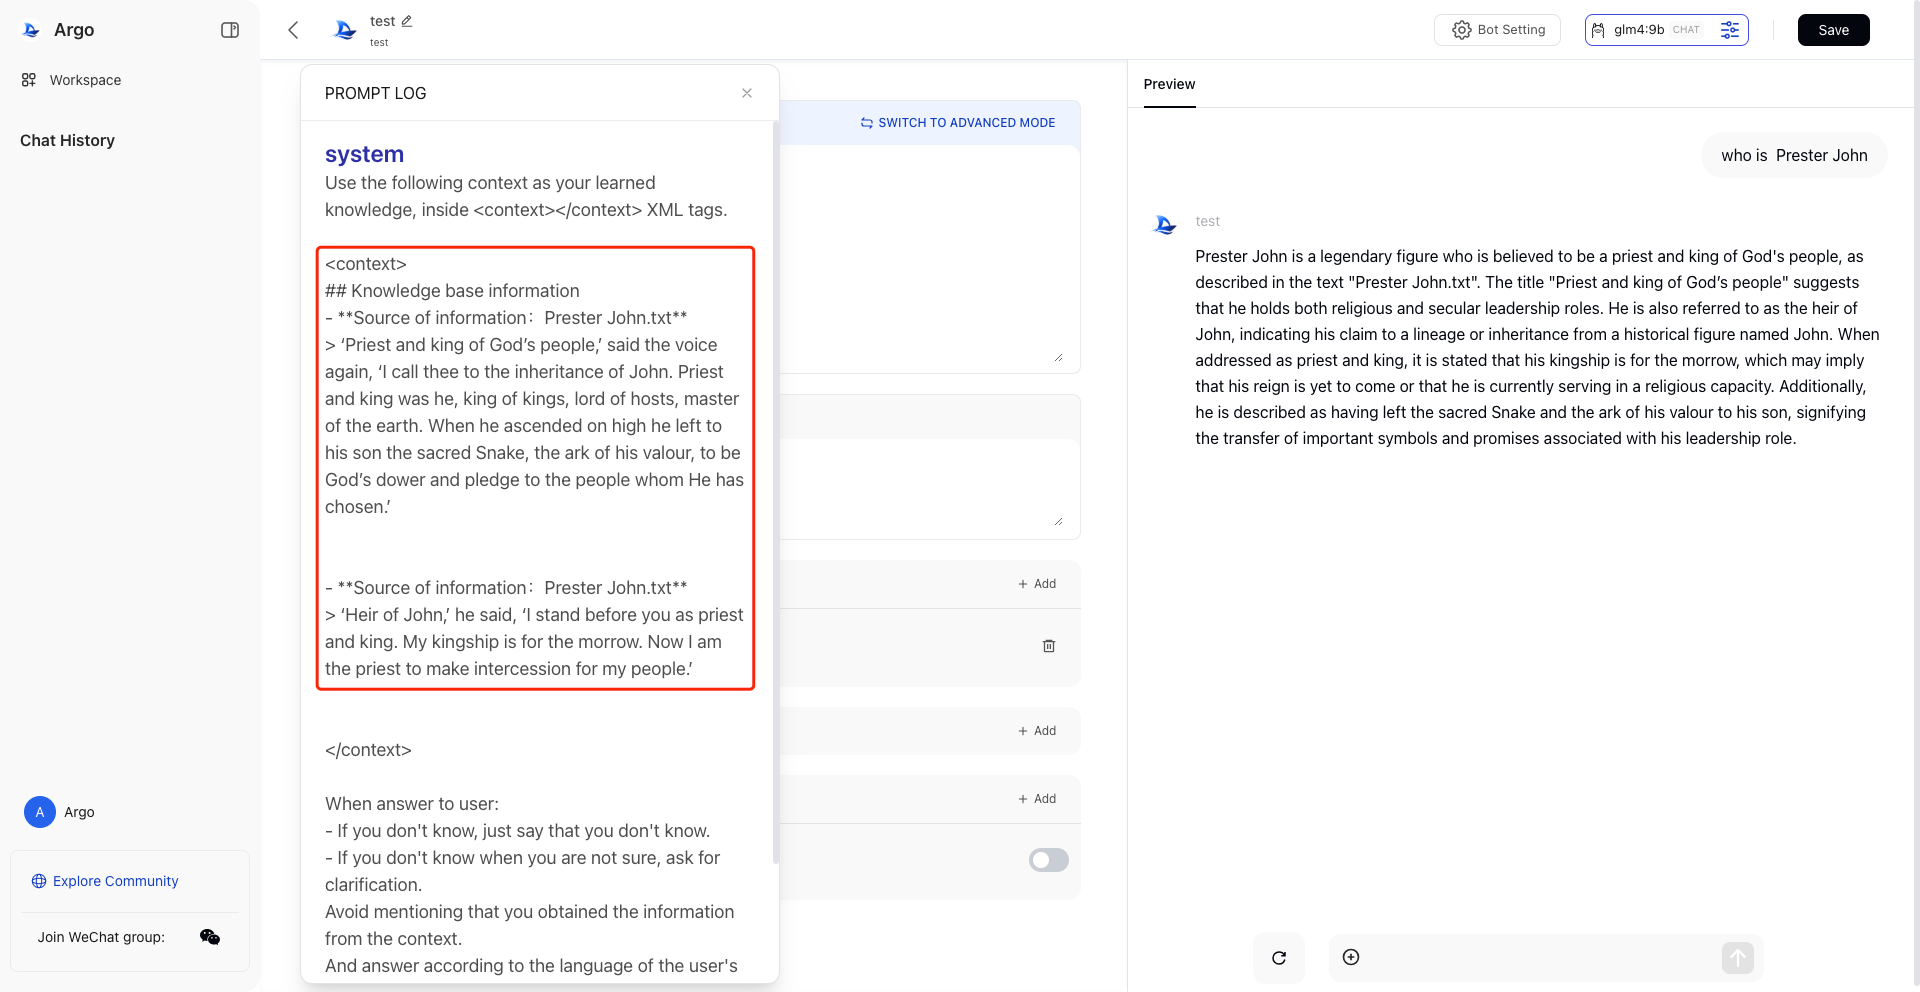
6.2 View Retrieved Chunks
Once the knowledge base is bound to the bot, you can view the retrieved chunks in the chat interface. Here is an example of the prompt and query logs:
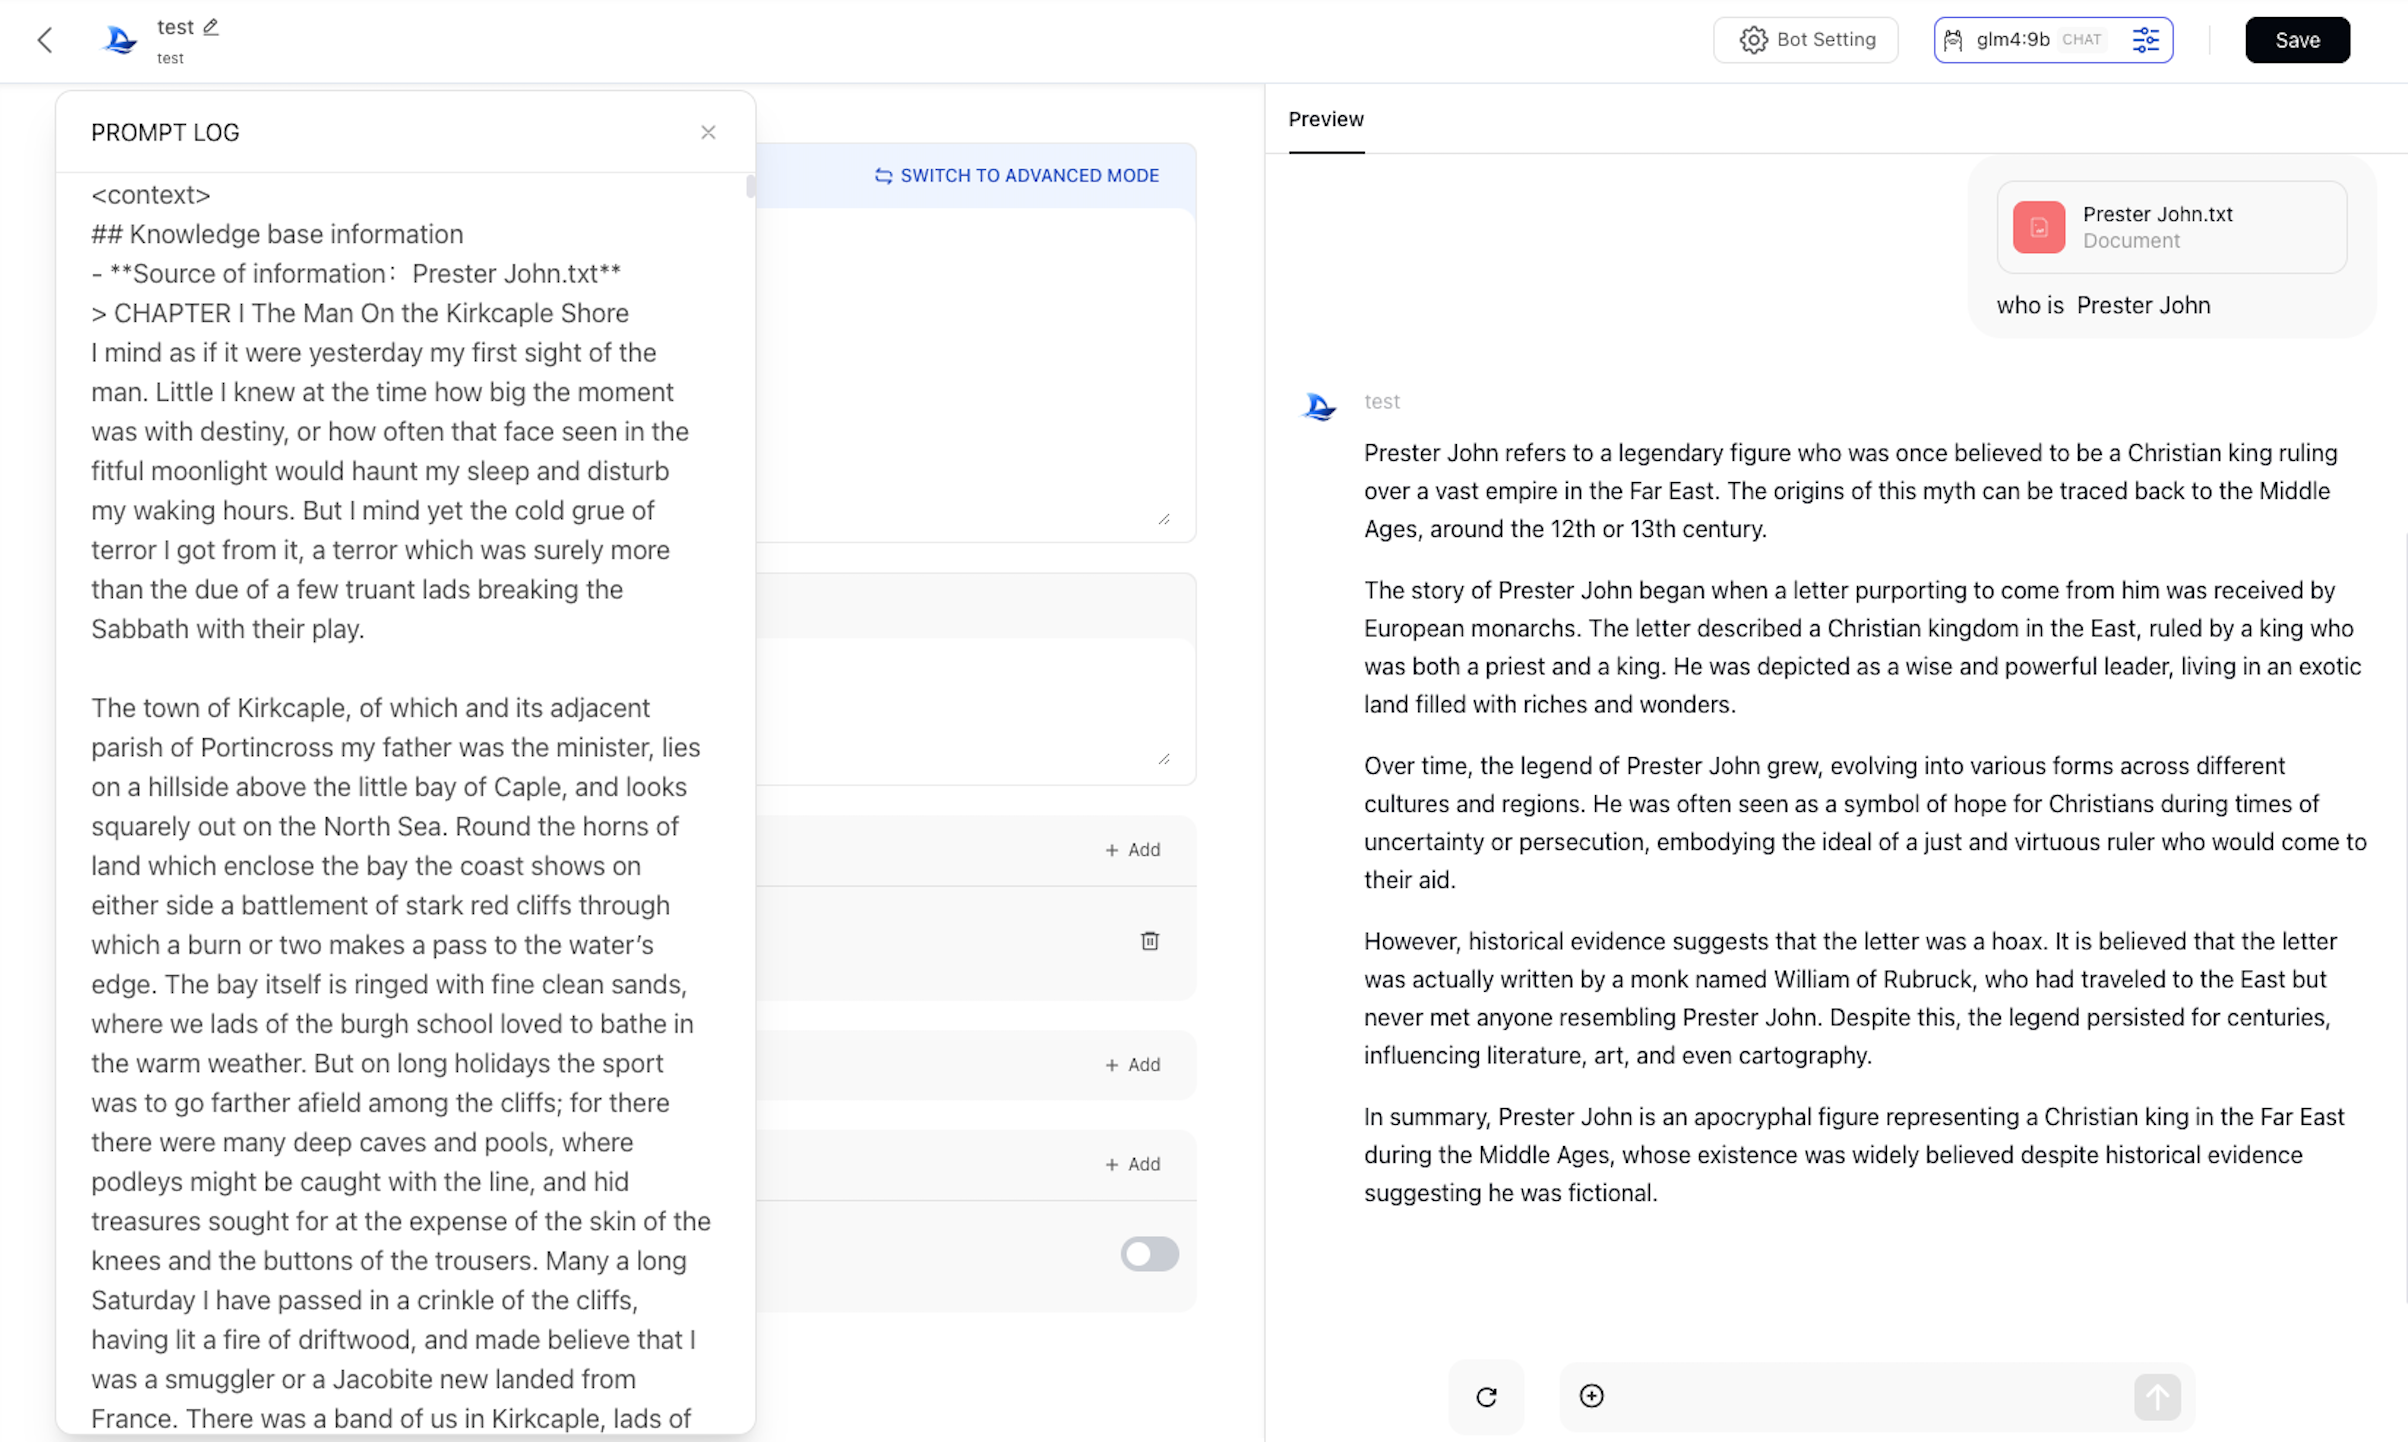
6.3 Full-Text Retrieval
If the current knowledge base retrieval is unsatisfactory and the document's character count does not exceed the model's maximum context length, you can try using the large model to directly analyze the full text. The following shows an example of full-text retrieval:
7. Use knowledge in Prompt
We have a built-in variable {{#context#}}, in Prompt we use {{#context#}} to give knowledge to LLM.
Example
Suppose you add Product Knowledge to your bot,Argo will automatically add following plaintext to Prompt, and will put user-defined prompt to the tail:
Use the following context as your learned knowledge, inside <context></context> XML tags.

<context>
{{#context#}}
</context>

When answer to user:
- If you don't know, just say that you don't know.
- If you don't know when you are not sure, ask for clarification.
Avoid mentioning that you obtained the information from the context.
And answer according to the language of the user's question.

[following text is user defined prompt]
hello, {{user_name}},it's {{date}}, please summarize Product Knowledge.
Advanced Mode(Click “SWITCH TO ADVANCED MODE”)
If you did not add Knowledge in standard mode, when switch to advance mode, you have to add {{#context#}} to Prompt yourself.
If you added Knowledge in standard mode, when switch to advance mode, system will automatically add default template as below.
In advanced mode, we can put {{#context#}} to anywhere in Prompt, thus making the response better.
In advanced mode, Argo will add following plaintext to Prompt:
Use the following context as your learned knowledge, inside <context></context> XML tags.

<context>
{{#context#}}
</context>

When answer to user:
- If you don't know, just say that you don't know.
- If you don't know when you are not sure, ask for clarification.
Avoid mentioning that you obtained the information from the context.
And answer according to the language of the user's question.
Advantage
- Make prompt more flexible.
- Better for complicated tasks.
🔔Tips
Switch from standard mode to advanced mode
- When switch from standard mode to advanced mode, prompt in standard mode will be remained.
- When switch from advanced mode to standard mode,prompt will be cleared。
- In advanced mode, if
{{#context#}}is not included in prompt, then knowledge will not take effect.
By following these steps, you can easily create, manage, and bind a knowledge base, as well as integrate it with a bot. You can upload and parse documents flexibly, adjust retrieval settings for optimal results, and review logs to ensure everything is functioning as expected.